
Spooky Snacks To Make For Your Next Halloween Party
Everyone celebrates Halloween differently. For some people, it’s an excuse to buy your dog cute Halloween costumes. For others, it’s watching scary B movies and exploring haunted houses. Or, it’s being that cool neighbour who hands out full sized chocolate bars to everyone who stops by your door. For many, Halloween isn’t just a day — it’s a state of mind during the month of October.

You tell ‘em Michelle. (We’ve watched too much Derry Girls.)
No matter how you celebrate Halloween, there is usually one thing in common — candy, chocolate, and deliciously spooky snacks. So whether you’re baking for yourself, or having a party with friends, here are some treats to get you in the Halloween spirit.
Spooky Sangria
To get the party started, you need a devilish drink! We made this sangria from Well Plated and you should too. Why? It’s made with red wine so you can pretend that you’re drinking blood. Warning: if you serve this at your party, vampires will have an easy time blending in.
All you need are some frozen grapes for “eyeballs”, citrus of your choice (the recipe calls for oranges, lemons, and limes, but you could probably get away with just using oranges plus lemons or limes), a bottle of fruity red wine, a sparkly drink for carbonation (we used ginger ale), and some brandy to kick it up a notch. The recipe calls for a cinnamon stick as well, but to be honest, we couldn’t taste it at all — we think this was because it was very citrus heavy. You could omit, or add more if you want.
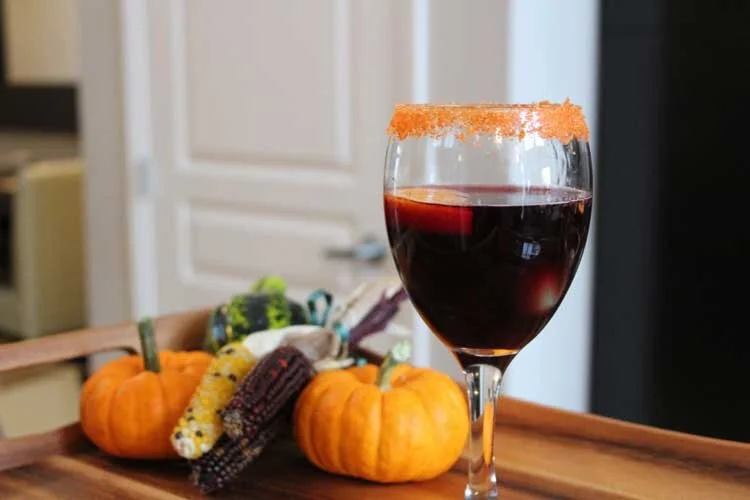
Before serving, let your sangria mixture sit for a couple hours so all of the flavours can get to know each other better. When serving, we love the idea of adding food colouring to sugar for rimming your wine glass — definitely do this!
Bloody Chocolate Cups
There are two ways you can make this delicious treat: the simple way or the hard way.
The simple way involves simply using chocolate that you’ve melted. This will result in a chocolate cup that is soft — think Reese’s Peanut Butter cups. It’ll melt in your hands easily when you hold it.
The hard way involves tempering your chocolate — tempering improves the consistency and hardness of the chocolate, and will give you a nice snap when you bite into it. Instead of taking the easy route, we decided that this was a perfect opportunity for us to try our hand at tempering chocolate. Because why not?
There are many different ways to temper chocolate, but the method we used required 3 steps:
Melt ⅔ of chocolate until it is between 110°F and 115°F.
Allow chocolate to cool until between 95°F and 100°F.
Add remaining ⅓ of chocolate and stir until everything is melted.
If you’ve followed these steps, then science has happened and you should have tempered your chocolate!
🎃 Mediocre Tip: Make sure to work very quickly after this is complete, because if your tempered chocolate hardens, then you’ll have to start the tempering process all over again. You may have to keep your tempered chocolate warm over a double boiler. But don’t get it too hot, otherwise it’ll untemper...de-temper? It loses its temper, which is no fun for anyone.
Pour some of your tempered chocolate into a muffin tin lined with paper muffin cups. Then tip the liners on their side and rotate them to coat the sides with the chocolate. Next, put them in the fridge for a few minutes to set (it only takes a couple of minutes) then add some raspberry compote to each of the liners. Finally top off the moulds with the rest of the chocolate and put everything in the fridge to set for about half an hour.
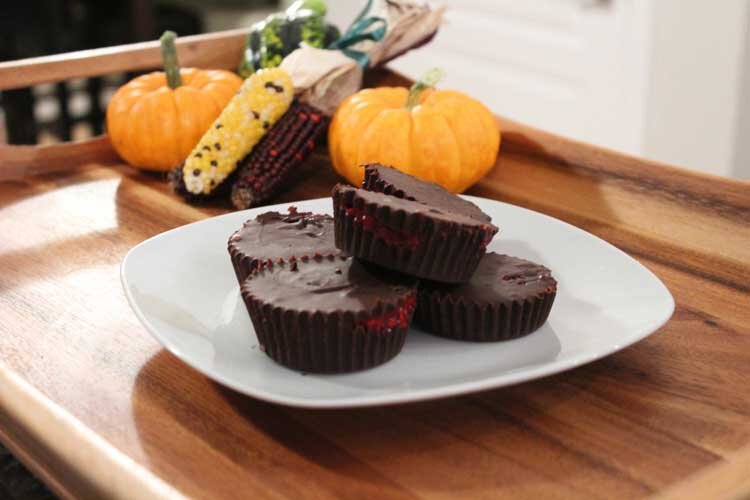
These are seriously so good.
By the way, the raspberry compote is super simple to make and can be made well ahead of time. Just add some frozen raspberries and sugar (or maple syrup) to a pot and turn the heat on until everything melts and is at a consistency that you like. Super simple, super delicious.
Caramel Corn
Caramel corn is a real treat! No tricks here — it’s super easy and super fucking delicious. We regret not making more of this. To make caramel corn all you need is:
6-7 cups of popcorn
1 cup of brown sugar
½ cup light corn syrup
½ cup unsalted butter
1 teaspoon vanilla extract
½ teaspoon salt
½ teaspoon baking soda
To start, preheat your oven to 250°F and prep the pan you’re going to put in the oven by lining it with aluminum foil and spraying it with cooking spray for good measure — this will make cleanup a whole lot easier. Pop your popcorn and put it in the pan, ready to be covered in delicious caramel sauce.
To make the caramel, mix the brown sugar, corn syrup, unsalted butter, and salt in a pot. Stir constantly and bring to a boil over medium heat. Once it has reached a boil, you’ll want to let it boil for five minutes without stirring. After, mix in the vanilla and baking soda. Pour it over your popcorn and stir to coat it as evenly as you can — you don't have to do it perfectly, as the next step is to put it in the oven for 45 minutes, checking in on it periodically and stirring. The caramel will stay warm in the oven, making it easier to distribute evenly as you give it a mix here and there.
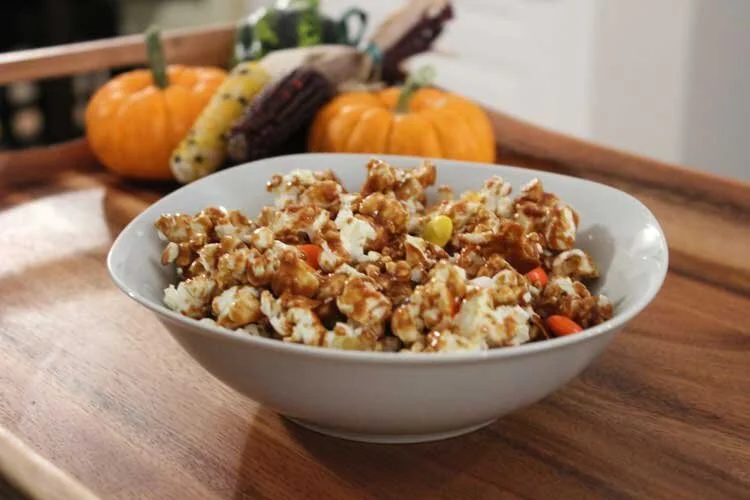
We added Reese’s Pieces to our caramel corn for a chocolate peanut butter surprise! If you’re having a party, make lots of this — it’ll go fast.
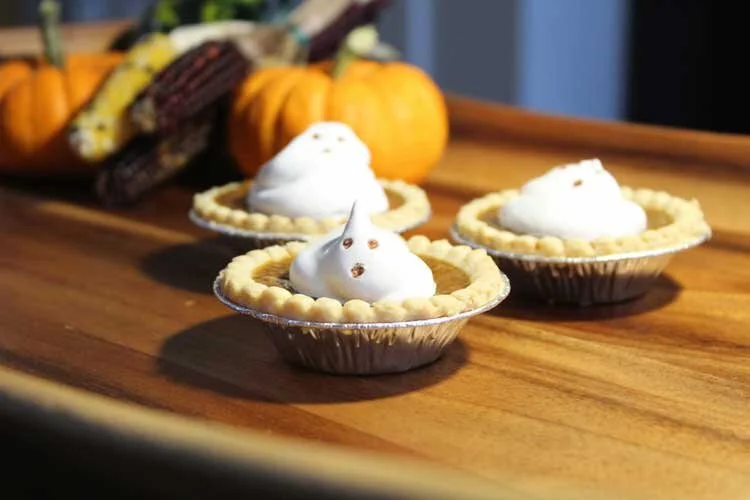
Pumpkin Tarts With Meringue Ghosts
Why you should make these: tis the season for Pumpkin flavoured things and meringue poltergeists are adorable otherworldly. We can’t take credit for the meringue ghosts idea — almost everyone and their grandma has made them. But they’re super cute spooky.
We cheaped out and bought frozen tart shells, but feel free to make some from scratch. However, definitely don’t cheap out on the pumpkin pie filling and make your own! We like this pumpkin pie recipe filling by Simply Recipes — whether you make a full pie or tarts is up to you!
Boo.
If you have egg whites, sugar, and a Ziploc bag for piping, you can make meringue ghosts.
With a double boiler (bowl on top of a pot filled with water), we whisked together egg whites from 3 large eggs with ¾ cups of sugar until the sugar didn’t feel gritty when you rub it between your fingers. Once that was achieved, we transferred it to a new bowl and beat it with an electric hand mixer until stiff peaks formed.
If you have fancy piping bags with tips, good for you — go ahead and use those to pipe your ghosts. We didn’t have any, so we made do with a Ziploc bag with one of the ends cut off. Get creative and try to make different shapes of ghosts!
We dipped the back of a toothpick in cocoa powder to make the faces on our ghosts. You could also use black icing gel, melted chocolate, or use candy eyes to give your meringue ghosts a face.
Halloween Cream Cheese Brownies
When looking for inspiration for this post we found these loaded brownies by Averie Cooks.
Warning: you may get diabetes just from reading this recipe. These brownies are insanely sweet, but also very good.
The brownie part of this recipe is fairly standard. Melt ½ cup of unsalted butter and 6 oz of dark or semi-sweet chocolate. A microwave makes this step very straightforward. Once you have yourself a bowl of buttery melted chocolate, crack in two large eggs, ¾ cup of sugar, and 1 tablespoon of vanilla extract, whisking everything together. You can optionally add some espresso grounds or some coffee to round out the chocolate flavour (we didn’t do this because we didn’t have any).
🎃 Mediocre Tip: Allow the buttery chocolate mixture to cool off a bit before adding the eggs. Otherwise you risk scrambling the eggs. Scrambled eggs and chocolate, anyone?
Once everything is mixed, add ¾ cup of flour and ½ teaspoon of salt and mix everything together. There will be a moment where you will think that you’ve added too much flour, but just keep mixing everything and eventually the flour will incorporate and create a glossy brownie batter.
Next, pour the brownie batter into a 9x9 inch greased and floured glass pan (the recipe called for an 8 inch pan, but we didn’t have one and the 9x9 seemed to work just fine). You’re halfway done!
To make the cream cheese layer, you’ll need a brick of softened cream cheese, one large egg, and ¼ cup of sugar. Mix them together with an electric hand mixer until smooth. Now it’s time to try and make the cream cheese orange. Brittany went a little bit insane trying to make it a vivid orange colour. Add a bit of red. Lots of yellow. A bit more red. A lot more yellow. More yellow. More yellow. Eventually, we got a pastel creamsicle colour that didn’t seem to want to budge and become a more vibrant Halloween orange.
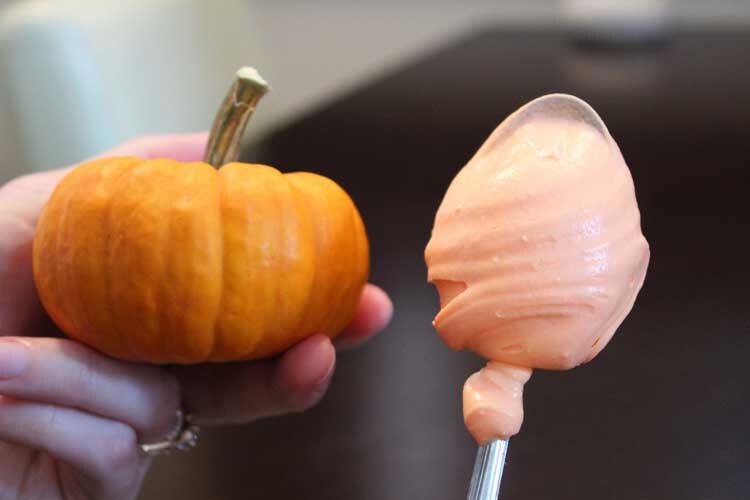
🎃 Mediocre Tip: If your cream cheese icing looks like this, don’t fret. When the cream cheese cooks it will darken and become a deeper orange colour!
After spreading our cream cheese icing atop the brownie mixture, we added the recommend toppings: chopped up Oreos and chocolate chips. We also added Reese’s Pieces because we had some and we thought, “It’s already going to be super sweet, adding a bit more can’t hurt.”

Hello diabetes, my old friend.
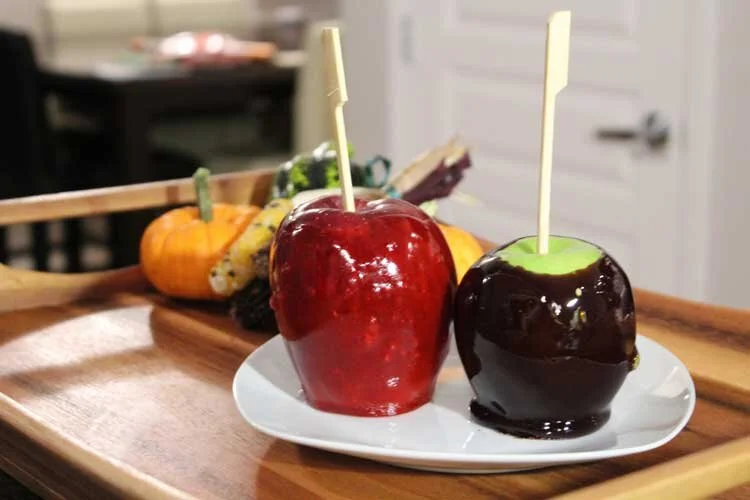
Poison (Candy) Apples
We have to admit: these candy apples didn’t turn out quite the way we wanted them to. Infact, the two that you see pictured here were the only ones that we got, and the black one was there mostly for show — it tasted bitter and nasty because we burned the sugar.
Why did this happen? Candy making is tough and unforgiving. It is deceptively simple to make a candy apple — hell, all you have to do is put corn syrup and sugar into a pot and wait until it reaches 310°F, then add some food colouring. What’s so hard about that?
Nothing really, until you realize that if it cools too much (below 310°F) you lose that nice glossy candy coating, and anything too hot (over 338°F) you start getting caramel or, the worst case scenario, burnt sugar (sugar burns at temperatures over 351°F — the more you know).

If you’re going to attempt this, we recommend having a partner with you. One of you will have to focus solely on maintaining the candy coating in the working temperature range of 310°F - 338°F, and the other will have to do the coating of the apples.
Once you’ve got the temperature thing down, it’s really quite simple to make candy apples: you literally stick a skewer in an apple, dip the apple in the molten sugar, and rotate it around until it’s coated. That’s it.
🎃 Mediocre Tip: Molten sugar is fucking hot — 310°F hot. This is hotter than boiling water, and if you get some on you, it will stick to you and cause burns and blisters. Any amount of water added to molten sugar will have a tendency to spray and splash — this includes food colouring. So be super careful when handling it.
If you don’t have a candy thermometer or a probe that can measure temperature, we recommend buying candy apples instead. It really is required! (A meat thermometer won’t cut it.)
Wishing all of you witches a Happy Halloween! Praise Satan.

What’s your favourite Halloween candy or treat? Let us know in the comments below!