
Yes, Chef! We Made The Italian Beef Sandwich from The Bear
Welcome to The Beef! If you couldn’t tell from our post about our favourite food TV shows and movies and our post about Matheson Food Company, we are big fans of both The Bear, and Matty Matheson. So of course we decided to try our hands at making an Italian beef sandwich from the show!

Where Can I Watch The Bear?
You can watch seasons 1-3 of The Bear on Hulu or Disney+.
If you haven’t watched The Bear yet, you need to RIGHT NOW.
Italian Beef Sandwich Recipe
We followed the recipe from Matty’s YouTube channel where he makes this sandwich alongside with Courtney “Coco” Storer, one of the chef consultants for The Bear.
Ingredients
4lb top sirloin or top round
2 tablespoons dried oregano¹
1.5 tablespoons garlic powder
1.5 tablespoons onion powder
1.5 tablespoons dried basil
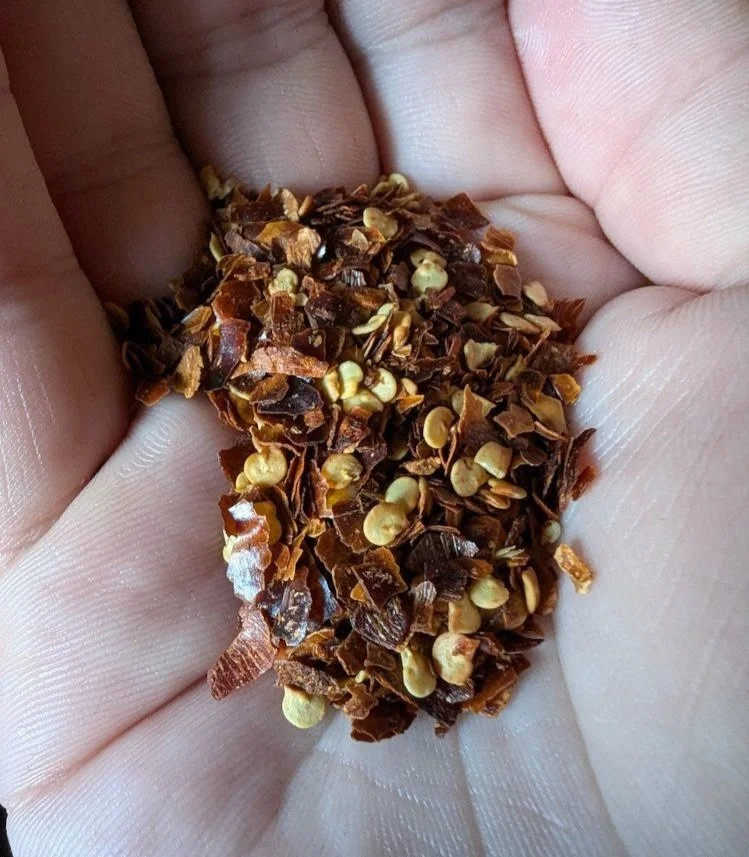
1.5 tablespoons crushed chili flakes²
1 tablespoons toasted black pepper
½ cup kosher salt
4 cups grapeseed oil
8 cups beef stock
2 whole heads of garlic
2 large carrots
2 onion
1 whole stalk celery
5 green bell peppers
5 sandwich rolls³
giardiniera⁴
¹The recipe says “Knorr preferred”. We had no idea that was a thing, nor could we find any Knorr brand oregano. Maybe Marco Pierre White might have some he could lend us?
²Use with caution. See the “Red Chili Flake Redux” section below.
³The original recipe says to use Turano, Gonnella, or Amoroso rolls. We couldn’t find these and used sandwich rolls from our local Italian grocer.
⁴If you wanna be fancy, you can also make giardiniera pretty easily. We were not fancy.
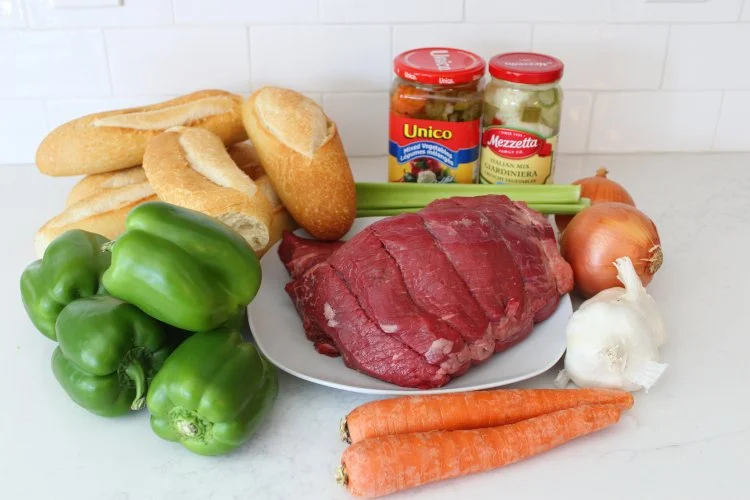
The main ingredients.
Obligatory Disclaimer: This post contains affiliate links that help us earn a small commission from your purchase (at no extra cost to you). Each purchase supports the blog so we can continue to make content! If you use these links, we really appreciate it!
It’s Time to Make a Sandwich
There isn’t much to this sandwich — the focus is on the beef, obviously. Buying a high quality cut of meat sure hurts the wallet, but the end results are worth it. That being said, you could definitely get away with using a lower quality cut of beef, but if you can afford it, get the top sirloin.
To start, you’ll want to trim the fat. The fat cap from our meat was already removed, so we didn’t have to do that. Season it generously with salt and pepper and sear it on all sides in a pan with your oil on medium-high heat. You want to give it some color — it’s going to finish cooking in the oven (speaking of which, you need to preheat it to 350°F).
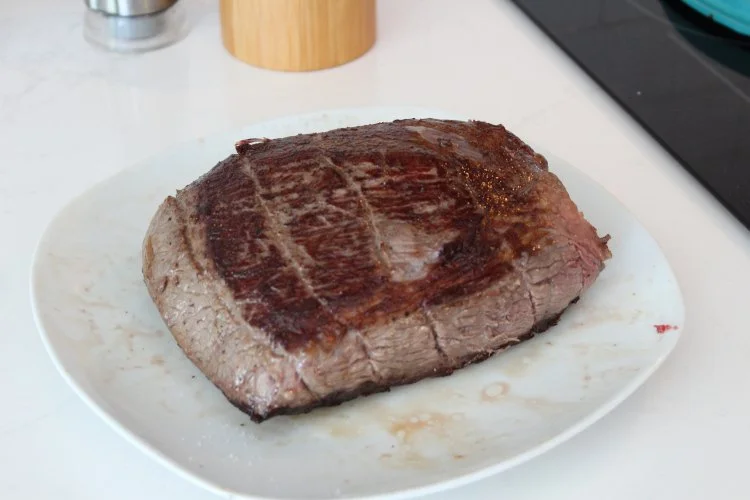
Half of our cooked beef.
Next step — add your aromatics (carrot, celery, and garlic). You don’t need to have these chopped. You just need to cut the carrots and celery into large chunks, and the garlic in half. We’re not eating these, we’re just using them to impart flavour into the jus we’re making. It’s so heckin’ easy. Your aromatics will help the fond from your beef come up from the pan, then you’ll add your beef stock and stir. Then all of your dried herbs and seasonings go in too.
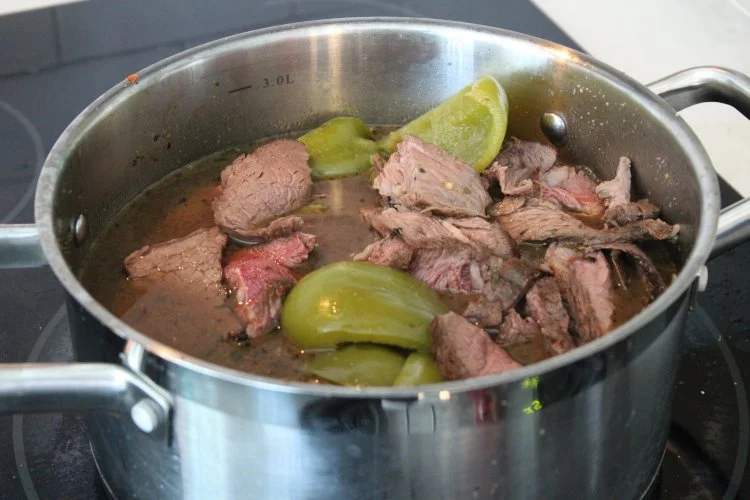
Give it another stir and then add your beef back in with the green peppers — we sliced ours into large chunks, sans seeds. (Or you can do it like Matty and tear your peppers like a mad lad.)
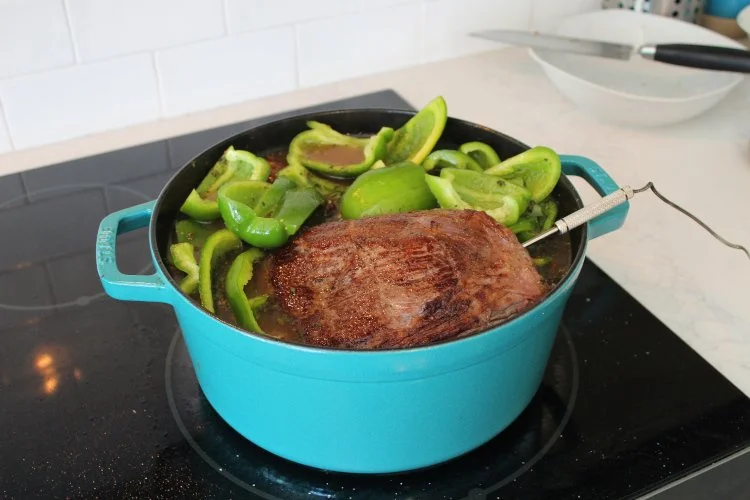
Our Dutch oven was almost too small…
Add the lid to your pot and stick it in the oven. If you have a meat thermometer that can go in the oven, stick that in your beef so you can watch the temperature. You’ll want to get the meat to ~115°F — when you take the beef out of the oven the residual heat will continue to cook it and it’ll come to rare (120-125°F). (Do not cook it until 120°C in the video like Matty says. Your food will be charcoal.)
When your beef is ready, take the pot out and remove the beef. Let it rest and cool separately.
You’ll also want to remove your bell peppers. The easiest way to do this is to pick them up with tongs, leaving the chunks of carrot and celery behind. Hopefully you sliced the peppers into large chunks like we mentioned above, if you made skinny slices you’re going to be fishing them out for a while.
Don’t disappoint Carmy.
We’re almost ready to assemble! The last thing to finish is the jus — you just need to strain the jus into another pot to separate it from the carrots, onions, and garlic. Give the jus a taste and add more salt if you think it needs more.
After your beef is rested, it’s time to slice. Now, you probably don’t have a meat slicer. We sure don’t. This would be the best way to get the meat nice and thin for your sandwich. The next best thing is a really sharp knife — get your sharpest knife and slice your beef as thin as you can.
Now, at this point the recipe says to add it back to the jus. Just know that this will cook your beef a bit more if your jus is still hot (it probably is). This is why it’s better to cook your beef to rare vs medium-rare!
After slicing your buns and grabbing your giardiniera from the fridge, it’s time to finally assemble your sandwich! (We won’t walk you through this step, put all of the ingredients on your sandwich, duh.)
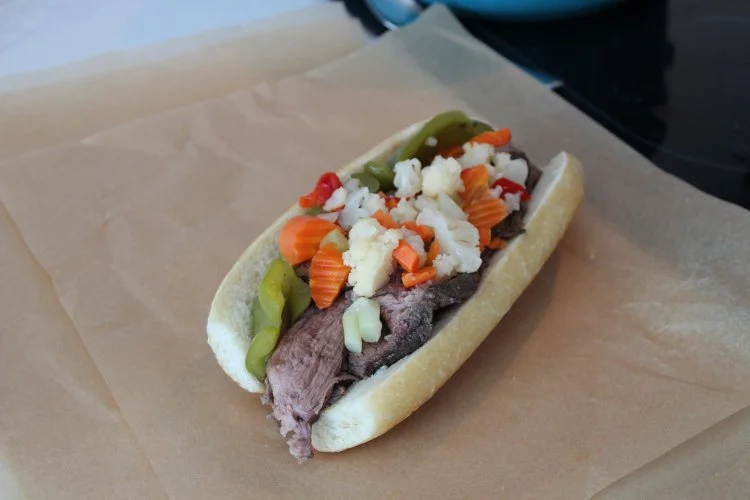
Sidenote: We bought two types (and brands) of giardiniera to test — mild (Mezzetta) and hot (Unico). The winner was the hot giardiniera, which wasn’t really hot in reality, it just had a bit of a kick to it which was pleasant. Next time, we’ll definitely try to make it ourselves. It’s delicious!
Red Chili Flake Redux
Oh Matty, here we are again. Those of you who have been here for a while might remember that we made Matty’s beef lasagna. You might also remember that, much like this recipe, the lasagna recipe called for an absurd amount of dried red chilis too. We have one question: why? Why do you insist on pain, Matthew?
Please, we beg of you. Our taste buds can not handle this anymore. Our stomachs can not handle this anymore. Our wallets can not handle this anymore — the amount of Pepto Bismol we need to buy to eat your food is insane.
We decided to be reasonable and use ½ tbsp of red chili flakes for the sandwich. Learn from our mistakes of the past. Don’t use 1.5 tbsp of red chili flakes. (Or 3 tbsp if you’re making his lasagna. 🔥)
Matty Matheson & Not Great Recipe Transcriptions (Name a More Iconic Duo)
So we noticed a few… inconsistencies when we were following this recipe. We watched the video first and also referenced the recipe in the video’s description.
Below is a list of all the inconsistencies that we’ve found between the two, and what we think was meant:
How much beef are we using Matty? The recipe in the description calls for 4lbs of top sirloin. So we bought 4lbs of top sirloin. We don’t want to brag, but our 4lbs was much, much bigger than his 4lbs. We’re pretty sure that he was only using about two pounds in the video, as we had to cut ours in half and one of our halves looks to be roughly the same size as what they used. Use 4lbs if you want to drop a fat stack on beef. (And make a lot of sandwiches.)
In step 4 of the recipe, he says to add in “dried herbs, bouillon, and seasonings”. What bouillon? At no point is that ever mentioned again. You’ve already added the beef broth by this stage, so that can’t be it either. So what happened? We don’t know. Maybe at some point there was a version of this recipe that called for using a bouillon cube instead of stock. Use whatever you want.
In the video, there’s a lid on the pot before it goes into the oven. In the recipe description, there’s no mention of using a lid. So what should you do? We decided to use a lid.
In the video Matty yells out that you’re cooking it to 120°C, which is about 250°F. This is about 100°F past well done. So don’t do that and cook it to 120°F. We get it, the metric system is tough. Another point of confusion with temperatures is that the description says cook to 140°F. The problem with that, is that when you rest it, the beef will shoot past 140°F and start entering into well done territory. And then you need to finish it in the jus, pushing it well past 140°F. Cook it to 115°F, rest it to 120°F, and finish it in the jus.
The final inconsistency is that the recipe says to cook for 1 hour. But in the video they say it should only take about 20-25 mins. If you don’t have a meat thermometer, it’s probably time to get one. Forget about time, cook your beef until it reaches the desired internal temperature.
Our Review
👨🍳 Trevor: You ever have a hankering for meat? And bread? And spicy vegetables? Then this sandwich is for you. It hits all the notes that I would want out of something called an Italian Beef Sandwich. It’s also pretty straightforward to make which is nice compared to some of the other food we’ve made. Would I make this again? Yes, but I’d use a different, less expensive cut of beef. And I also wouldn’t touch the super hot, just out of the oven, metal pot lid. Not that I did that or anything. 👀
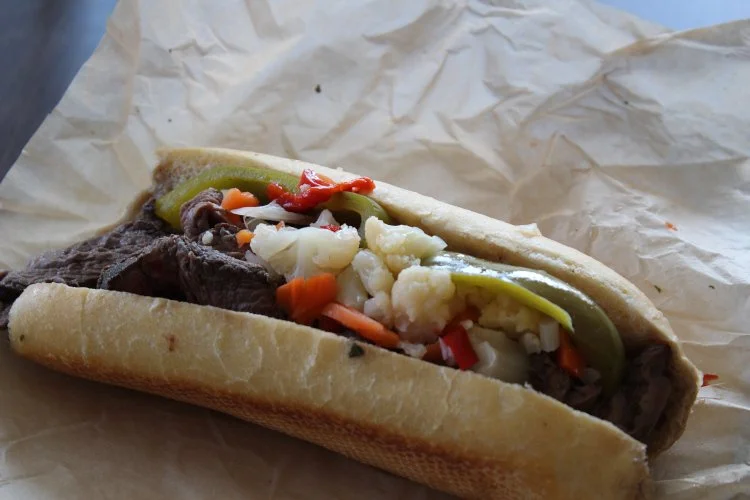
👩🍳 Brittany: This was my first time having giardiniera on a sandwich, and it won’t be my last. These tangy crunchy vegetables have earned their spot on more sandwiches in the future. I’m a fan of Philly cheesesteaks, beef dip, etc. so I figured I would love this Italian beef sandwich. I did. It was delicious and filling. However, I don’t recommend eating an Italian panino and donuts (because you’re hungry and can’t wait) before making this recipe, because then you won’t have room to eat all of this monstrous sandwich. (Oops.) The good thing is that this is also great leftovers (just don’t pre-assemble your sandwiches unless you’re a soggy bread enjoyer.

Deconstructed Italian beef sandwich.
Our Rating
Taste: 4 out 5 donuts by Marcus 🍩🍩🍩🍩
Presentation: 3 out of 5 line cook tattoos 🧑🍳🧑🍳🧑🍳
Affordability: 0 of 5, need to take a loan from our uncle to afford the beef
It’s a sandwich. A damn good one. Its cross section isn’t going to look as pretty as some other sandwiches (it’s mostly just beef), so we can’t give it full marks for presentation.
Affordability is a tough one. We feel like every recipe we’ve made for the blog recently isn’t affordable. Beef is expensive. Maybe that’ll be something we can write about in the future — affordable recipes that don’t make your soul hurt and your bank account cry when you buy the ingredients.
Conclusion
Italian beef sandwiches are simple and tasty. If you have the means to afford it, treat yourself to a nice cut of beef and make a damn good sandwich.
Hands!